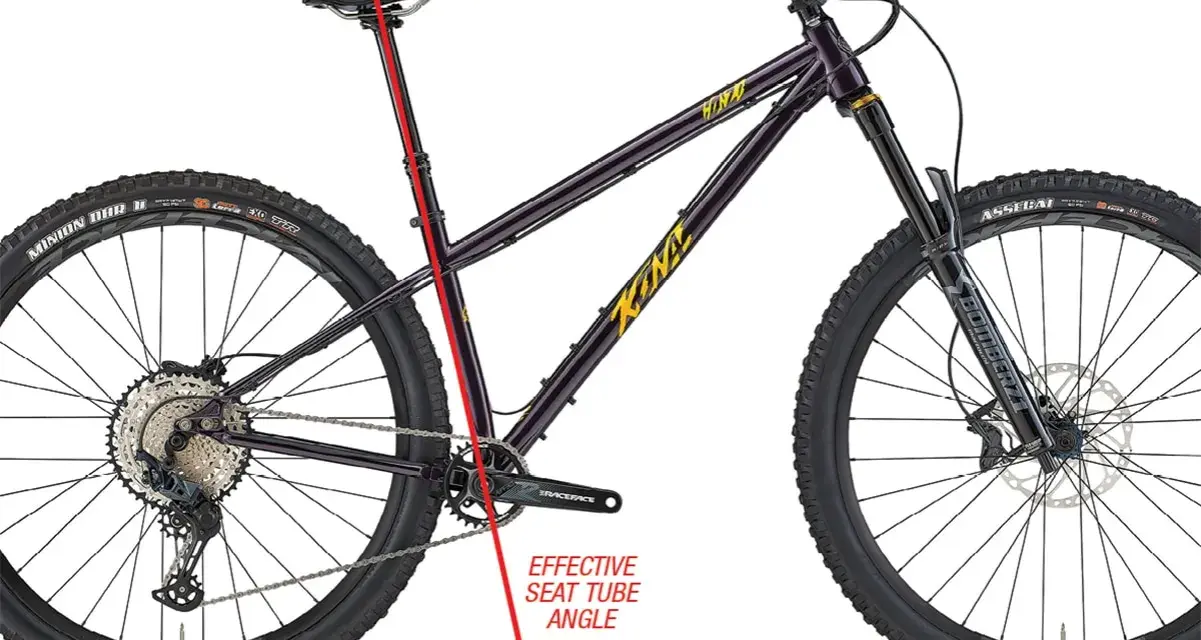
The MTB seat angle is one of the biggest reasons two mountain bikes with similar travel can feel completely different on climbs. In this guide I break down what the angle actually measures, why effective and actual numbers often differ, how it changes seated climbing and comfort, and how to dial in your own setup without chasing a geometry chart blindly. I’ll also cover the common mistakes that make a bike feel cramped, rearward, or unstable even when the frame size is right.
The useful number is the one that keeps you centered, efficient, and comfortable on climbs
- Seat tube angle is the frame geometry; saddle tilt is a separate adjustment.
- A steeper effective angle usually moves your hips forward and helps the front wheel stay planted on climbs.
- On full-suspension bikes, the quoted number is only part of the story because sag changes the real riding position.
- Modern trail and enduro bikes usually run steeper effective angles than older designs, but cockpit fit still has to match your body.
- Small saddle fore-aft changes, often 5 to 10 mm, can matter more than chasing a new frame immediately.
What seat angle really measures on a mountain bike
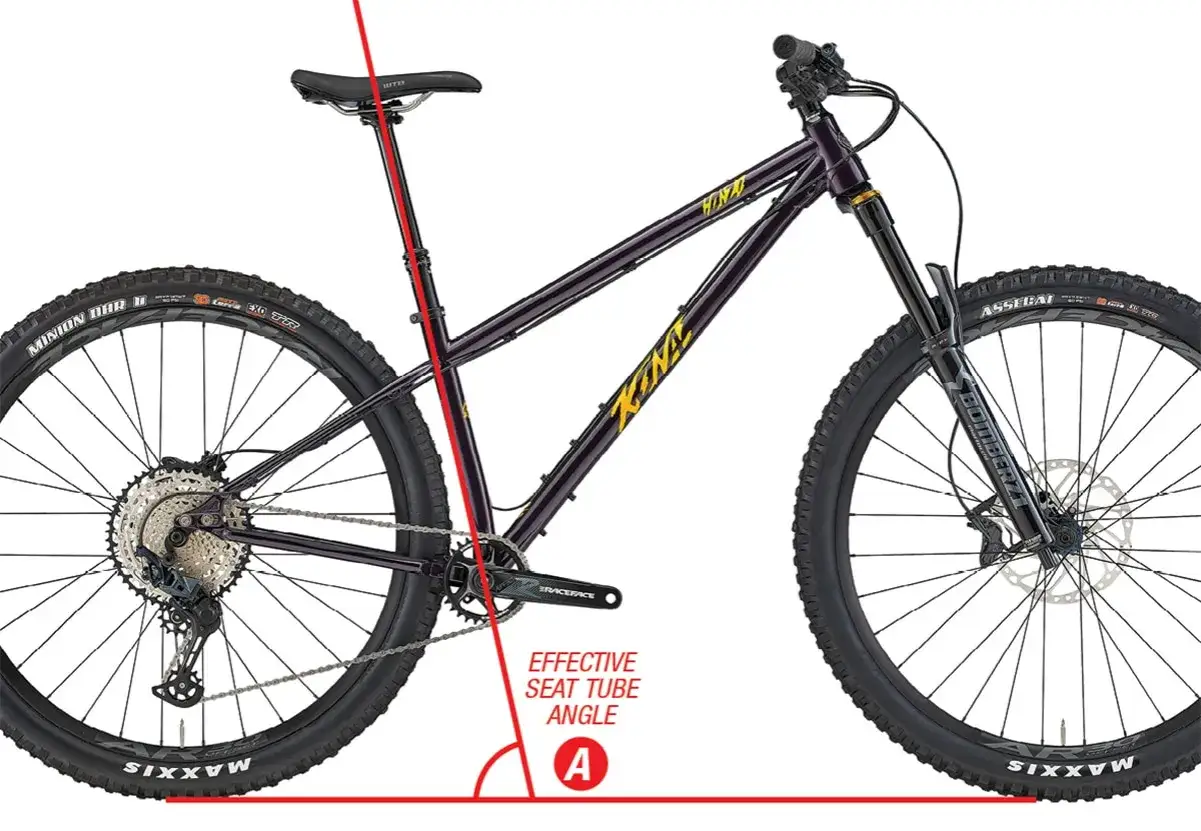
When riders talk about seat angle, they usually mean the seat tube angle, not the angle of the saddle itself. That distinction matters because the frame geometry sets your default pedaling position, while saddle tilt and fore-aft position only fine-tune it.
On a hardtail, the number is fairly straightforward. On a full-suspension bike, I pay more attention to the effective seat angle, because suspension sag changes where your hips sit once you are actually riding.| Term | What it means | Why it matters |
|---|---|---|
| Actual seat tube angle | The angle of the frame’s seat tube as built | Useful as a basic geometry reference, but not the full riding picture |
| Effective seat tube angle | The rider position created by the frame, saddle height, and sometimes sag | Usually the better number for fit and climbing balance |
| Saddle tilt | Nose-up or nose-down saddle adjustment | Affects comfort and pressure, not the frame geometry itself |
| Saddle setback | How far the saddle sits behind the bottom bracket | Changes weight distribution and how centered you feel over the pedals |
The easiest way to read the chart is to ask a simple question: where will my hips sit relative to the bottom bracket when I’m pedaling seated? Once you think in those terms, the rest of the geometry starts making sense, including why modern bikes are trending steeper. That leads directly to the real performance question: what does that change on the trail?
Why a steeper angle changes climbing feel
A steeper seat position moves your weight forward and centers your hips more directly over the pedals. That reduces the rearward bias on steep climbs and makes it easier to keep the front wheel down without yanking on the bars.
I notice the biggest difference on long, technical climbs where traction and body position matter more than raw power. A steeper setup can make a bike feel calmer and more efficient, but only if the cockpit still leaves enough room for your torso and arms.
- Better seated climbing traction. More of your mass stays in a useful position over the drivetrain.
- Less front-wheel wander. The bike is less likely to lift its nose on steep pitches.
- More open pedaling posture. A good angle can make sustained seated efforts feel smoother.
- A real tradeoff. Too steep can feel cramped, especially if reach and bar height are not matched.
That balance is why frame designers keep pushing seat angles steeper while also lengthening reach; one change without the other usually creates a new problem instead of solving the old one. To judge a bike properly, you have to know which number you are actually looking at.
Actual angle, effective angle, and why geometry charts can mislead
Geometry charts can be useful, but only if you know which number you are looking at. The actual seat tube angle describes the tube as built into the frame; the effective angle is the rider position created by that frame, the saddle height, and sometimes the suspension position.
That is why two bikes with similar charts can feel different. A frame with a curved or offset seat tube may quote a steep number on paper, yet place you farther behind the pedals once your saddle is set high. Size-specific geometry adds another layer, because some brands steepen or slacken angles slightly as frame sizes change.
I would be cautious with any chart that does not clearly say whether the number is measured at rest or at sag. On a modern full-suspension bike, that missing context can be the difference between a bike that climbs well and one that feels oddly rear-biased.
If one bike feels dramatically more efficient than another, the reason is often not just the head angle or suspension travel. The seat position is doing a lot of quiet work in the background, and that is easy to underestimate until you ride a steep fire road or a punchy root climb. Once you understand that, setup becomes much easier to approach in the right order.
How to set up your own bike before blaming the frame
When a bike feels off, I always start with the saddle before I start talking about frames. Saddle height comes first, then fore-aft position, then tilt. That order matters because a bad height can disguise a good seat angle, and a bad fore-aft position can make a good geometry feel wrong.
- Set saddle height so your hips stay still and your knee has a slight bend at the bottom of the stroke.
- Ride a steep seated climb and note whether your front wheel feels light or your hips feel too far behind the pedals.
- Move the saddle fore or aft in small steps, usually 5 mm at a time.
- Keep saddle tilt close to level. A tiny nose-down change can help comfort, but it should not be your main fix.
- Repeat the same climb after each change so you can feel the difference clearly.
Most riders are surprised by how much a few millimeters change the bike. If you move the saddle too far forward, the climb may improve but the cockpit can feel short and the descending position can get awkward. That is why I prefer small steps and one change at a time rather than chasing a dramatic correction. Different riding styles, though, still want different starting points.
What different riding styles usually want
The right seat angle depends on where and how you ride. A steep climbing machine does not automatically make sense for every trail network, and a more moderate angle is not a flaw if your riding is flatter or more descending-focused.
| Riding style | Common effective angle | Why it tends to work |
|---|---|---|
| XC and marathon | About 75.5 to 78° | Supports seated power and keeps weight centered on long climbs |
| Trail | About 76 to 78° | Balances climbing efficiency with room to move on descents |
| Enduro | About 76.5 to 79° | Helps on punchy climbs without ruining descending balance |
| Downhill and park | Less central, but not wildly slack | Seated pedaling is secondary, so fit and dropper clearance matter more |
| e-MTB | Often on the steeper side | Extra weight and slower climbing speed reward a centered seat position |
These are tendencies, not rules. In 2026, many trail and enduro bikes sit in that mid-to-high 70s zone because brands want better climbing without making the bike feel nervous on the way down. The real question is whether the geometry matches the terrain you actually ride, not whether it looks aggressive on a spec sheet. The next trap is assuming that a good number on paper automatically means the bike is set up correctly.
The mistakes that make a good angle feel wrong
Most problems I see come from one of five places: the saddle is too far back, the saddle tilt is being used to fix a fit issue, the frame size is too small or too large, the rider is comparing static geometry on a suspension bike, or the cockpit reach no longer matches the new seat position.
- Confusing saddle tilt with seat angle. A nose-down saddle can relieve pressure, but it does not change frame geometry.
- Chasing steepness without checking reach. If the bar feels too close after moving forward, the bike can become cramped even if climbing improves.
- Ignoring sag on full-suspension frames. The bike’s climbing position is not the same as its garage-stand position.
- Moving too far in one step. A 10 mm change is noticeable; a 20 mm jump can ruin the balance.
- Using one position for every trail. What feels perfect on steep, seated fire-road climbs may feel inefficient on flatter loops.
The fix is usually not glamorous. Start with the simplest adjustment, test it on the kind of climbs you actually ride, and only then decide whether the frame geometry itself is the limitation. That brings me to the buying and upgrade decisions where the numbers matter most.
What I would check before buying a new frame or upgrading the cockpit
If I were comparing bikes today, I would look at three things before anything else: the effective seat angle, the amount of dropper insertion the frame allows, and whether the cockpit length still makes sense with the saddle in the right place. Those three details tell me far more about real-world climbing comfort than a lone geometry chart number.
- Check whether the published angle is actual or effective.
- Look for size-specific geometry if you ride an extra-small or extra-large frame.
- Make sure the seat tube and dropper length allow your preferred saddle height.
- Ask whether the bike has a flip chip or geometry adjustment that changes the seat position.
- Test the bike on a steep seated climb, not just a parking-lot spin.
If the bike climbs well, keeps the front wheel planted, and still gives you room to move on descents, the seat angle is doing its job. That is the standard I use: not the steepest number on paper, but the position that makes the bike feel centered, efficient, and easy to trust when the trail tips upward.