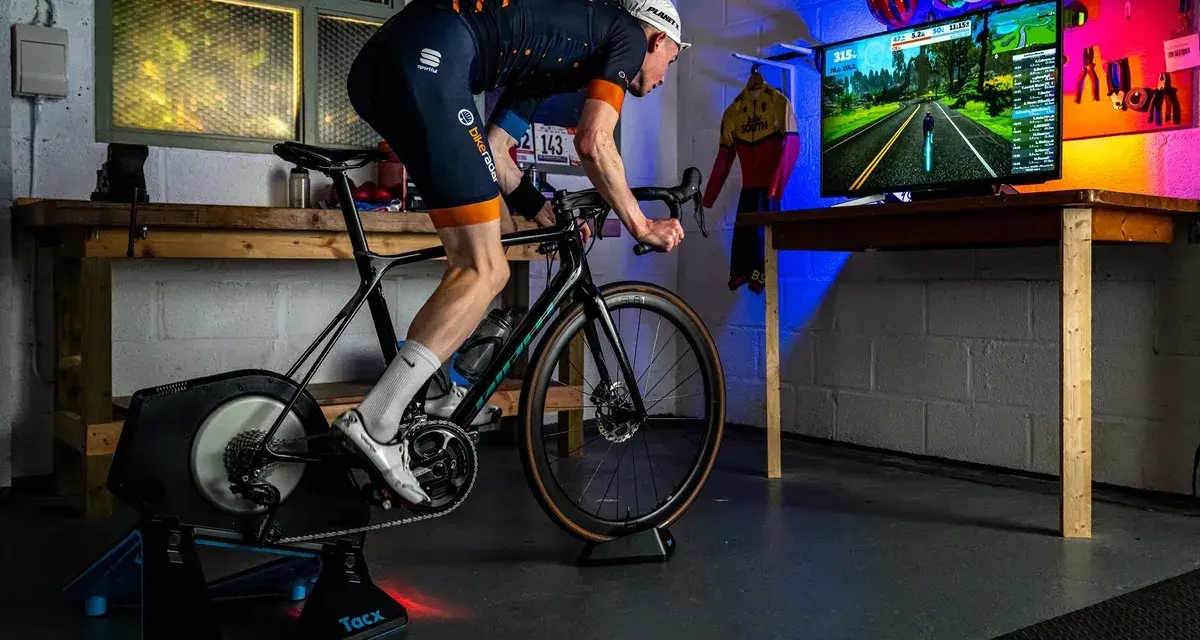
What matters most before the first ride
- Match the trainer to your bike first. Axle standard, cassette, and drivetrain compatibility decide whether setup feels easy or frustrating.
- Direct-drive trainers are quieter and more stable. Wheel-on trainers are faster to install and usually cheaper, but they need more attention to tire pressure and roller tension.
- A level surface changes everything. A mat, a front wheel block, and a fan do more for comfort than most accessories.
- Smart trainers need pairing and calibration. Do that after the bike is mounted and the trainer is warm.
- Most beginner problems are mechanical. Loose adapters, over-tightened rollers, and poor alignment create almost all the noise and wobble.
Choose the trainer style that fits your bike and routine
The first decision is not resistance level or app features. It is trainer style. I usually break it into three categories: wheel-on, direct-drive, and rollers. Each one changes the setup process, the noise level, and how much attention you need to pay to compatibility.
| Trainer type | Setup effort | Typical U.S. price range | Main advantage | Main tradeoff |
|---|---|---|---|---|
| Wheel-on | Fast | $150-$400 | Quick to mount, lower cost | More tire wear, more noise, more calibration sensitivity |
| Direct-drive | Moderate | $500-$1,200+ | Quiet, stable, realistic feel | Needs cassette and exact axle compatibility |
| Rollers | Simple hardware, higher skill | $100-$450 | Natural pedal stroke, no clamping | Steeper learning curve, less forgiving for casual riders |
For regular indoor training, I lean toward direct-drive because it feels the most like a committed home setup. For occasional winter riding or a bike that still spends time outside, wheel-on is often the more practical answer. REI and manufacturer support pages point in the same direction: the “best” choice is the one that matches your axle standard, your noise tolerance, and how often you will actually use it.
That compatibility check matters more than most riders expect. In the U.S., the common rear standards you will run into are quick-release, 12x142 mm thru-axle, and 12x148 mm thru-axle, and the trainer adapter has to match the bike exactly. If you get that wrong, everything else becomes harder than it should be.
Get the room ready before you start building the trainer
I treat trainer space like a small workshop, not just a spot on the floor. A stable indoor setup starts with a flat surface, enough room to swing a leg over, and a few inexpensive items that keep the ride quiet and controlled.
- Trainer mat: usually $30-$80, and worth it for noise reduction, floor protection, and grip.
- Front wheel block: usually $15-$40, useful for direct-drive setups and essential for wheel-on trainers if you want a level bike.
- Fan: usually $25-$100, because indoor heat builds faster than most people expect.
- Towel and bottles: simple, but they keep sweat from soaking the bike and the floor.
- Power and connectivity: an outlet nearby helps if you are using a smart trainer, tablet, or head unit.
- Correct cassette or adapters: budget roughly $40-$120 for a cassette if your direct-drive trainer does not include one.
My rule is simple: spend money on stability before you spend money on extras. A good mat and a decent fan change the experience more than a fancy mount or a flashy accessory. If the floor is uneven, shim the setup or move it, because a trainer that rocks even slightly tends to feel louder, harsher, and less confidence-inspiring once the effort goes up.
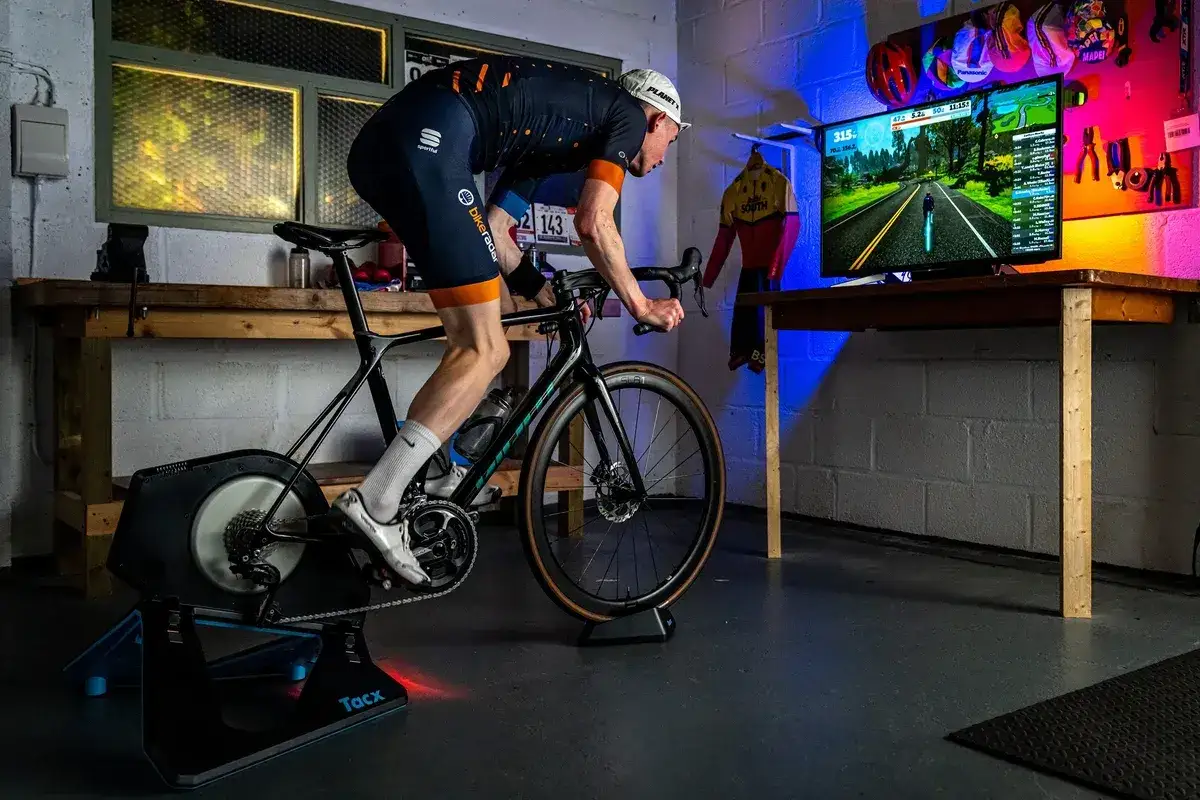
Assemble the trainer and mount the bike
This is the part where precision matters. A trainer is not difficult to assemble, but it rewards a slow first pass. I always start with the trainer itself fully opened on the floor, then I confirm the contact points and adapters before touching the bike.
Direct-drive setup
- Open the trainer legs fully and place it on a level mat or floor.
- Install the cassette if your trainer does not already have one. Match it to your drivetrain as closely as possible.
- Shift the bike to the smallest rear cog before removing the rear wheel. That reduces chain tension and makes the swap cleaner.
- Install the correct axle adapters for your frame. Quick-release, 12x142 mm, and 12x148 mm bikes each need the right hardware.
- Remove the rear wheel, guide the chain onto the trainer cassette, and seat the bike onto the trainer carefully.
- Insert the axle or skewer and tighten it to the trainer’s specification. Snug is enough; over-tightening is not a badge of honor.
- Spin the cranks by hand and check that the chain runs smoothly. If it sounds rough, stop and check alignment before riding.
Wheel-on setup
- Place the trainer on a mat and unfold the legs fully.
- Install the correct skewer or axle adapter if the trainer requires one.
- Set the rear wheel squarely on the roller and use a front wheel block if you need the bike level.
- Tighten the roller until it makes firm contact with the tire, then follow the manufacturer’s recommended turns or tension setting.
- Check that the tire is centered on the roller and that the bike sits straight in the trainer frame.
- Start with an easy spin and listen for tire slip, rubbing, or a hollow knocking sound.
With wheel-on units, the common mistake is over-tightening the roller in an attempt to make it “feel more solid.” That usually adds heat, noise, and tire wear without improving the ride. Firm contact is enough. If the trainer is set correctly, the tire should track smoothly and the rear wheel should not wander under load.
Dial in fit, resistance, and calibration
Once the bike is mounted, I adjust the setup so the trainer feels like a real ride rather than a compromise. That means keeping the bike position close to your outdoor fit, matching the resistance mode to the workout, and calibrating anything that measures power.
Keep your fit consistent
I keep saddle height, saddle setback, and cleat position the same as my outdoor bike unless there is a specific comfort issue. Indoor riding changes the environment, not the geometry. If the front wheel sits lower than the rear, use a block or riser so your posture stays natural and your hips do not tilt forward.
Use resistance mode on purpose
Smart trainers usually give you two useful modes: ERG and slope simulation. ERG mode holds a target wattage, which is excellent for structured intervals and controlled endurance work. Slope mode changes resistance more like a road does, which feels better for free riding or warm-ups. I would not use ERG for every minute of every session, because it can feel too rigid when all you want is a smooth spin-up.
Read Also: Magnetic Resistance Bikes - Smooth, Quiet, Consistent Ride
Calibrate before hard work
If your trainer supports calibration, do it after a 10-minute warm-up, not while everything is cold. That matters most for wheel-on trainers, because tire pressure and roller pressure affect readings more than many riders realize. If you change tire pressure, move the trainer, or notice power drifting, recalibrate before the next structured workout.
It also helps to run the trainer’s firmware update and pair it with your app before the first serious ride. I like to test Bluetooth or ANT+ connectivity, confirm that the power source shows up correctly, and then do a short five-minute spin at low intensity. If the numbers and the feel both make sense there, the setup is usually good enough for real training.
Avoid the mistakes that make a simple setup frustrating
The biggest trainer problems are rarely dramatic. They are usually small setup errors that compound once you start pedaling. I see the same handful of issues over and over, and they are all fixable.
- Wrong axle adapter: the bike may seem mounted, but the fit is unstable or the drivetrain sits off-center.
- Uneven floor: even a small rock becomes obvious once you stand up to sprint or climb.
- Over-tightened wheel-on roller: this creates heat, tire wear, and a dull, noisy feel.
- Skipping warm-up calibration: power numbers drift and the workout stops feeling trustworthy.
- Poor ventilation: sweat turns indoor riding into a slog faster than most riders expect.
- Loose bolts or feet: the trainer feels vague, especially during standing efforts.
If I had to pick one mistake that causes the most frustration, it would be rushing the first mount. People want to ride immediately, so they skip the adapter check or ignore a slight wobble. That almost always costs more time later. A five-minute inspection now saves a noisy hour later.
The setup I keep ready for repeat rides
The best indoor setup is the one you do not have to rebuild every time. If the trainer will live in one place, I leave it assembled, keep the mat in position, and mark the floor lightly if I need to move it back into place after cleaning.
- Wipe sweat from the frame, bars, and trainer after every ride.
- Check bolts, adapters, and feet once a week if you ride often.
- Recheck tire pressure and roller tension before wheel-on sessions.
- Inspect the cassette and chain for dirt or wear if the trainer stays mounted long term.
- Keep the fan, towel, and bottles in the same place so the first ten minutes feel automatic.