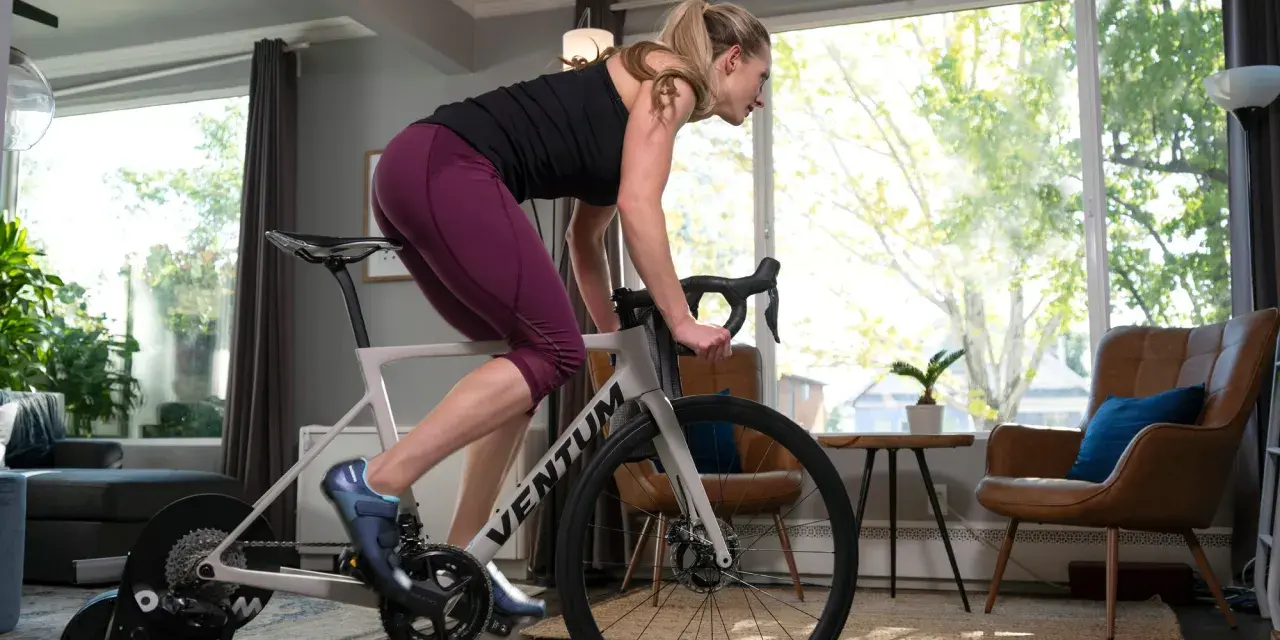
A proper indoor bike setup should make it easy to pedal smoothly, keep your knees happy, and hold a relaxed upper body for longer rides. I focus on the same sequence every time: saddle height, saddle fore-aft, handlebars, then pedals and resistance. Get those four pieces right and the bike starts to feel like an extension of your body instead of a machine you are fighting.
The quickest route to a comfortable ride is a fit-first approach
- Start with saddle height. Everything else depends on how your legs extend through the stroke.
- Use the knee-over-pedal check. It keeps the seat from drifting too far forward or back.
- Keep the bars comfortable, not heroic. Indoors, you do not need a low, aggressive position unless you actually enjoy it.
- Match resistance to form. If you are bouncing or grinding, the load is wrong.
- Recheck after 15 to 20 minutes. Small fit errors often show up only after the warm-up.
What matters most before you touch the resistance dial
Indoor cycling rewards repeatability. Outdoors, you shift around the bike, stand to relieve pressure, and get help from the wind; indoors, every small mistake stays visible because your body is more fixed in place. That is why I treat the bike as a fit problem first and a fitness tool second.The goal is not to copy a racing position. A home bike or studio spin bike should let you breathe, keep your shoulders loose, and maintain a stable pelvis. If your position already feels tense before the workout starts, resistance will only amplify the problem. I would rather see a slightly higher, more forgiving position that you can hold for 45 minutes than a fancy-looking setup you abandon after ten.
Once the big idea is clear, the order is straightforward: set saddle height, then fore-aft position, then reach. After that, fine-tune the contact points and the room around the bike.
Set saddle height first because everything else depends on it
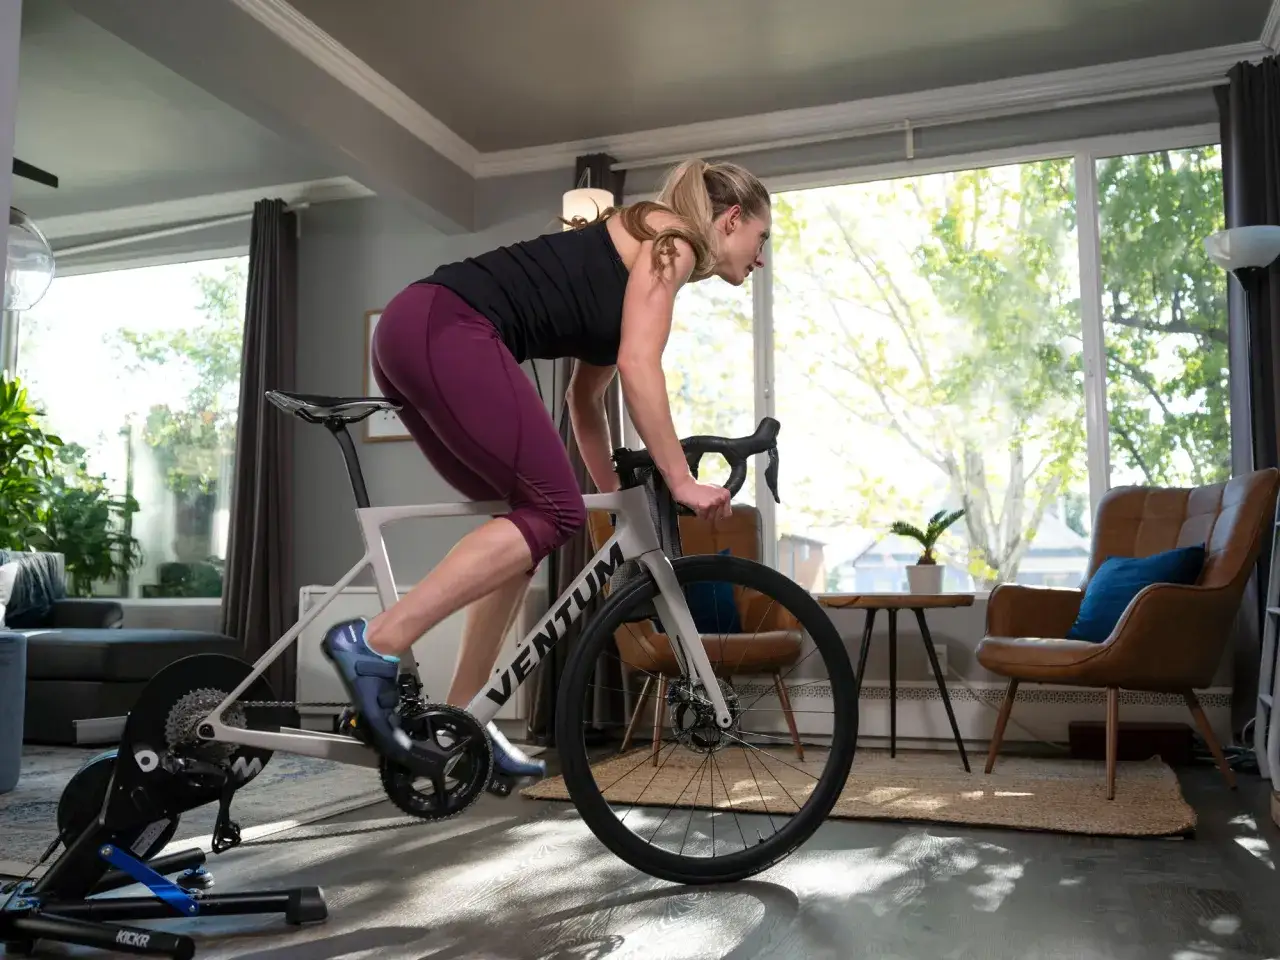
I start by standing beside the bike and raising the saddle to roughly hip-bone height. That is only a starting point, but it gets you close fast. From there, I use the heel test: place your heel on the pedal at the bottom of the stroke, and your knee should be straight or nearly straight. When you clip in or move to the ball of the foot, that straight leg becomes a slight bend of about 5 to 10 degrees at the bottom.
If the seat is too low, the knee stays too bent and you usually feel more strain in the front of the knee. If it is too high, your hips may rock side to side and you may start reaching for the pedal with your toes. That usually feels inefficient long before it becomes painful. I make small changes here, often just a few millimeters at a time, because the difference between “solid” and “off” can be tiny.
Read Also: Zwift Setup Guide - Build Your Perfect Indoor Cycling Experience
Keep the saddle level
Once the height is close, check the angle. A nearly level saddle is the safest default. Too much nose-down tilt can dump weight into your hands and make you feel like you are sliding forward; too much nose-up tilt can create pressure where you do not want it. A small tweak can help, but I would not chase a dramatic tilt unless there is a clear reason.
If your bike is shared, write the height down or mark it with tape. Indoor bikes are unforgiving when the settings drift, and consistency is worth more than guessing each time you ride.
With height in place, the next step is to line up your knees with the pedals rather than letting the saddle position quietly distort the stroke.
Move the saddle forward or back until your knees track cleanly
Set the pedals at the 3 o'clock and 9 o'clock positions, then look at the front knee. My rule of thumb is simple: the kneecap should sit roughly over the middle of the pedal, or the ball of the foot should feel like it is supporting the knee in a straight, balanced line. If the knee is clearly ahead of that line, slide the saddle back. If it is clearly behind it, move the saddle forward.
This adjustment changes more than comfort. It changes how much work the glutes and quads share, and it can decide whether your lower back feels calm or irritated by the end of the ride. Riders who force the saddle too far forward often feel more knee pressure; riders too far back often feel like they are reaching and bracing through the torso.
If you use clipless pedals, cleat position matters too. Sometimes what looks like a saddle problem is actually a shoe setup problem, especially if one knee tracks differently from the other. I usually solve cleat angle and foot placement before I make a huge saddle compromise.
The key is balance, not perfection. A few millimeters can matter, but the body gives much better feedback than a ruler once you start pedaling under load.
Choose handlebar height and reach that you can hold without bracing
Indoors, comfort usually beats aggression. I typically start riders with the handlebars at or slightly above saddle height, often about 1 to 2 inches higher for newer riders or anyone with tight hips, a sensitive lower back, or a long first season of indoor training ahead. You can always lower them later if you want a more athletic torso angle, but you cannot ignore a position that already feels cramped.
When the bars are right, your elbows stay softly bent, your shoulders sit away from your ears, and your back feels long rather than rounded. If you have to lock your arms or shrug to reach the bars, the reach is too long or the bars are too low. If your chest feels jammed into your hips, the bars may be too high or too close.
I also pay attention to what the rider has to do with the neck. If you are staring up at a built-in screen or craning toward a laptop, the setup is asking for tension in a place that should stay relaxed. It is a small detail, but neck strain ruins a lot of otherwise decent indoor rides.
The practical test is simple: after a few minutes, you should feel supported, not folded. If you are fighting the front end of the bike, the fit is still too aggressive for the job.
Get pedals, shoes, and resistance working with your body
The foot is the last major contact point, and it matters more than many riders expect. On a flat pedal bike, I want the ball of the foot centered over the pedal so the ankle can move naturally. On clipless pedals, the cleat should let the foot sit in its natural angle instead of forcing the toes inward or outward just to make the stroke feel “locked in.” If your feet feel hot, numb, or unstable, the problem is often in this part of the setup.
Resistance deserves the same discipline. Light resistance can make the bike feel twitchy, with your hips bouncing and your knees moving all over the place. Heavy resistance can make you grind, brace your upper body, and load the knees in a way that gets ugly fast. I like to see enough load that the stroke stays smooth, but not so much that the cadence collapses.
A good test is this: if you can spin smoothly without your torso bobbing and without feeling like you need to push against the handlebars, the resistance is probably in the right zone. If the bike feels either slippery or brutally heavy, adjust before you start chasing a hard workout.
This is also the point where many riders realize fit and effort are linked. Better mechanics let you use more resistance later, but the resistance should never be used to mask a bad position.
Build a home space that helps the fit stay consistent
A solid bike fit can still fall apart if the space around it works against you. I want a mat or floor protector under the bike, a fan that actually reaches the rider, a towel within arm’s reach, and water where I can grab it without twisting. Sweat management is not cosmetic indoors; it protects the frame, the floor, and your ability to stay comfortable long enough to finish the session.
Repeatability matters just as much. If the bike sits in a different spot every time, or the bars and saddle are constantly being reset by different people, the setup will drift. I prefer to keep a simple reference system: a tape mark, a note on the phone, or a numbered setting on the posts. That makes it much easier to return to a position that already worked.
For longer rides, I also think about view and airflow. Good light, a screen at a sensible height, and a fan angled toward the chest and face can make the same bike feel dramatically easier to tolerate. The machine does not change, but the experience does.
That kind of setup does not sound glamorous, yet it is usually the difference between a bike that gets used and a bike that becomes a coat rack.
Spot the warning signs before a small fit issue becomes a problem
Most bad fits announce themselves early if you know what to look for. Front knee pain often points to a seat that is too low or too far forward. Hip rocking usually means the saddle is too high. Numb hands often come from bars that are too low, too far away, or from a rider who is using the handlebars for support instead of the core. A tight lower back often means the reach is too long for the rider’s mobility or that the torso is being forced into a shape it cannot hold.
| What you feel | Likely setup issue | First adjustment to try |
|---|---|---|
| Front-of-knee soreness | Saddle too low or too far forward | Raise the saddle slightly, then recheck fore-aft position |
| Hips rocking side to side | Saddle too high | Lower the saddle a few millimeters |
| Hands going numb | Bars too low, too far away, or too much weight on the hands | Raise the bars or shorten the reach |
| Lower-back tightness | Reach too long or torso angle too aggressive | Bring the bars up and check saddle angle |
| Feet feel hot or unstable | Cleats, straps, or pedal contact off center | Reposition the foot and check cleat alignment |
If the discomfort is one-sided, persistent, or sharp, I stop making casual tweaks and get more careful. Sometimes the issue is a leg-length asymmetry, a cleat that has drifted, or an old injury that needs a different approach. And if pain keeps showing up even after the obvious adjustments, a professional bike fit is the smarter move than guessing.
The most useful habit is to fix one variable at a time and ride long enough to feel the result. That leads into the last thing I always keep in mind: the best setup is the one you can repeat and keep refining, not the one you set once and forget.
The small checks I keep using after the first few rides
After the first couple of rides, I recheck the bike with fresh legs. Sometimes what feels perfect at the start turns out to be a little too high, a little too low, or a little too far once the body warms up and the cadence settles. A short ride does not always reveal that, which is why I prefer a 20-minute test rather than a three-minute guess.
I also revisit the setup whenever one of the inputs changes. New shoes, different cleats, shorter or longer cranks, a different saddle, or even a new pair of shorts can shift how the bike feels. Indoor riding rewards small maintenance habits: wipe the bike down, keep the bolts secure, and note the settings that actually work so you are not rebuilding the fit every week.
That is the real payoff of a thoughtful indoor cycling setup. Once the bike fits, the workout stops being about compensating and starts being about pedaling well, which is where the training value lives.