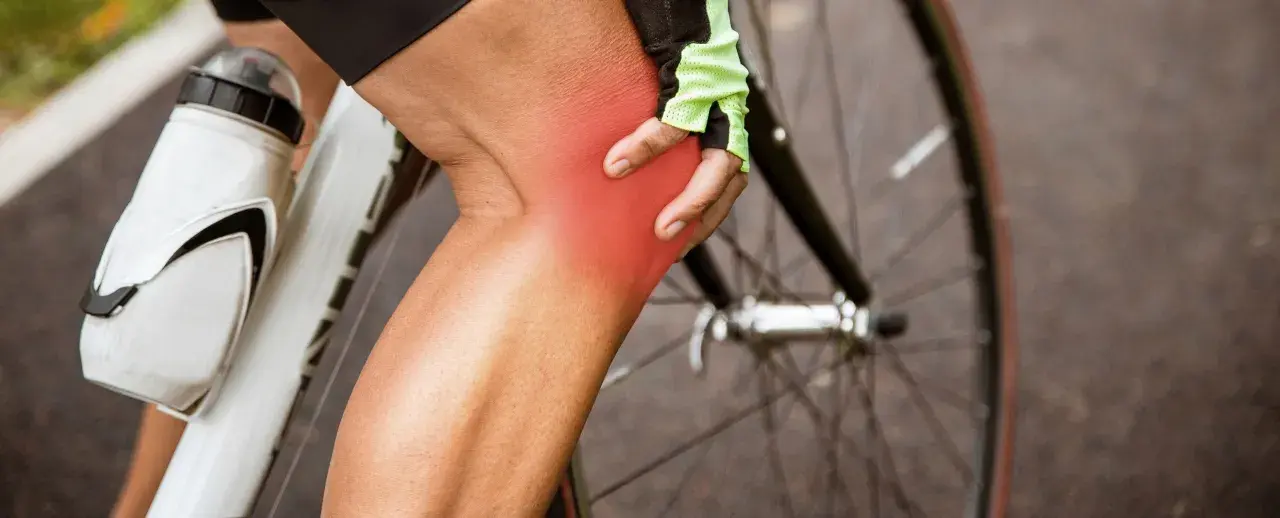
The right cycling knee pain exercises can do more than stretch a sore joint. They can shift work back to the hips, quads, hamstrings, and calves so pedaling feels smoother, lighter, and less irritating on the knee. I’m focusing here on the movements that actually help, how to dose them, and the bike-fit checks that keep the problem from coming right back.
What helps most when cycling makes your knee hurt
- Most cycling knee pain is load-related, not the result of one single bad ride.
- Start with mobility for the hip flexors, quads, hamstrings, and calves before you chase heavy strength work.
- Glutes and single-leg control matter because they help the knee track better under pressure.
- Small bike-fit mistakes like saddle height, cleat angle, or too much grinding can keep the pain alive.
- Mild discomfort is one thing; swelling, locking, giving way, or sharp pain are signs to stop and get assessed.
Why knees hurt on the bike in the first place
When I look at cycling-related knee pain, I usually think in three buckets: too much load too soon, a position issue on the bike, or a strength and mobility gap off the bike. The knee is often the part that complains, but the root cause is frequently higher up at the hip or lower down at the foot.
That is why a rider can do “all the right stretches” and still feel the same twinge if the saddle is too high, the cleats are twisted, or every ride turns into a hard grind. Front-of-knee pain often behaves differently from outside-knee pain, and back-of-knee tightness usually points in a different direction again.
| Where it hurts | What it often suggests | What I would try first |
|---|---|---|
| Front of the knee | Too much pressure through the kneecap, often from a low saddle, big gears, or overuse | Easy spinning, wall squats or half squats, quad mobility, lighter resistance |
| Outside of the knee | Irritation around the iliotibial band or poor hip control | Glute bridge, clamshells, side-lying hip work, check saddle height |
| Inside of the knee | Knee tracking or cleat alignment problems | Single-leg balance, step-downs, cleat check, ride with a smoother pedal stroke |
| Back of the knee | Often a sign of overextension, especially with a saddle that is too high | Recheck saddle height, hamstring mobility, reduce torque for a few rides |
This is a pattern check, not a diagnosis, but it is a useful one. Once you know which direction the pain leans, the next step is choosing movements that change the load instead of just chasing the ache.
The movements that usually help most
I like to separate this work into two jobs: restore motion where things are tight, then rebuild the muscle support that keeps the knee steady under load. If a rider has front-of-knee irritation, I usually keep deep knee-bend work out of the opening act and start with calmer movements first.
Start with mobility
- Half-kneeling hip flexor stretch. Hold for 30 to 60 seconds on each side, 2 to 3 rounds. This is one of the first moves I use when the front of the hip feels locked up after long rides.
- Standing quadriceps stretch. Hold for 30 to 60 seconds, 2 to 3 rounds per side. Keep the torso tall and avoid arching the back; the goal is a clean stretch in the front of the thigh, not a twist through the spine.
- Supine hamstring stretch. Hold for 30 to 60 seconds, 2 to 3 rounds per side. Tight hamstrings can change how the knee moves at the bottom of the pedal stroke.
- Calf stretch on a step or wall. Hold for 20 to 30 seconds, 2 to 3 rounds. Calves matter more than most cyclists think because they help control how force travels through the lower leg.
Then add strength and control
- Glute bridge. Aim for 2 to 3 sets of 8 to 12 reps. This is simple, but it does a lot of work for hip extension and pelvic control, which can reduce the knee’s workload.
- Clamshell. Do 2 to 3 sets of 12 to 15 reps per side. It targets the side glutes, which help keep the knee from collapsing inward when you push on the pedals.
- Side-lying hip abduction. Keep the top leg straight and lift slowly for 2 to 3 sets of 10 to 15 reps. I like this when a rider needs more hip stability without a lot of knee bend.
- Wall squat or half squat. Stay shallow at first, especially if the front of the knee is cranky. Think 2 to 3 sets of 8 to 12 controlled reps, not a deep burn-fest.
- Low step-down. Step from a low platform and keep the knee tracking over the middle toes. This is one of the best control drills for cyclists because it teaches the leg to absorb force instead of wobbling through it.
- Single-leg balance. Start with 20 to 30 seconds per side. It looks easy, but it exposes foot and hip instability very quickly.
I would avoid turning any of these into a contest. If the knee gets sharper during the set, if the form changes, or if the pain is still clearly worse later that day or the next morning, I back the load down. A little effort is useful; a flare-up is not.
How to fit the work around your rides
The easiest way to make these movements stick is to stop treating them like a separate fitness program. I prefer to attach them to moments that already exist in a cyclist’s week: before rides, after rides, and two or three off-bike sessions.
| When | Best work | Why it fits there |
|---|---|---|
| Before a ride | 5 to 10 minutes of easy spinning, then dynamic mobility | Warms the joint without tiring it out |
| After a ride | Static stretches for hip flexors, quads, hamstrings, and calves | Helps restore motion after repetitive pedaling |
| Two or three non-consecutive days per week | Glute bridge, clamshell, hip abduction, step-down, wall squat | Builds support without needing long sessions |
A good starter dose is usually 2 sets of 8 to 12 reps for strength moves and 20 to 60 seconds for stretches. If that feels too easy after a week or two, add a little resistance, another set, or a slower tempo. I would change only one variable at a time so you know what actually helped.
For riders coming off a flare-up, I also like a simple pain rule: keep discomfort mild, and pay attention to the next 24 hours. If the knee settles after the session and does not feel worse the next day, the load is probably in the right range. If it ramps up while you ride or stays hot afterward, back off before it becomes a bigger problem.
Bike-fit fixes that make the exercises work
Exercise helps, but it will not fully rescue a bike that is set up badly for your body. Saddle height is the first thing I check, followed by saddle fore-aft, cleat alignment, and how hard the rider is pushing the gear. A strong leg still hates a poor setup.
| Adjustment | What to look for | Why it matters |
|---|---|---|
| Saddle height | Your knee should keep a slight bend at the bottom of the pedal stroke, not lock out or stay overly bent | Too high or too low can both irritate the knee |
| Saddle fore-aft | Your knee should track smoothly over the foot, not feel jammed forward or pulled behind the pedal | Bad fore-aft placement changes how force reaches the joint |
| Cleat rotation | Your foot should sit at a natural angle, not twisted inward or outward | Twist at the shoe can show up as pain at the knee |
| Gear choice | If you are grinding a big gear, the knee is doing more work per stroke | An easier gear reduces peak force and usually feels friendlier |
| Reach and posture | You should not feel jammed up or stretched out through the hips | Excess reach can change pelvic position and alter knee tracking |
One practical rule I use: make one change, then test it on a short ride before you touch anything else. If the saddle needs adjustment, do not also move the cleats, swap shoes, and change your gearing on the same day. That kind of guesswork makes it impossible to know what actually worked.
It also helps to ride easier than your ego wants for a few sessions. If the knee is irritated, use a lighter gear, keep the cadence smooth, and skip long climbs or hard intervals until the discomfort has settled. The exercises do their best work when the bike is not poking the same sore spot over and over.
When the pain is a stop sign, not a training signal
Some knee discomfort is a load problem that improves with smarter training. Some of it is a warning that the knee wants a break and a proper assessment. The difference matters.
- Stop and get checked sooner if the knee swells noticeably after riding.
- Stop and get checked sooner if it locks, catches, or gives way.
- Stop and get checked sooner if the pain is sharp rather than dull or sore.
- Stop and get checked sooner if the pain followed a fall, crash, or direct impact.
- Stop and get checked sooner if you feel numbness, tingling, or unusual weakness.
- Stop and get checked sooner if the knee is still clearly worse the next day after easy riding and light mobility.
If a ride leaves the knee hotter, more swollen, or more painful for more than a day, I would not keep pushing volume just to be disciplined. At that point, a sports medicine clinician or physical therapist can look at the hips, ankles, and bike setup together, which is usually where the useful answer sits.
The routine I would keep once riding feels normal again
The goal is not to collect a giant list of corrective drills. The goal is to keep the knee quiet enough that you can train consistently. For most cyclists, that means a small weekly habit rather than a rescue plan you only do when pain spikes.
- Keep one lower-body strength session focused on glutes, quads, and single-leg control.
- Keep one mobility block after longer rides, especially for hips, quads, hamstrings, and calves.
- Recheck saddle and cleat position any time you change shoes, pedals, or bikes.
- Increase ride time or intensity gradually, not both at once.
If I had to boil the whole topic down, I would say this: the best long-term fix is not one heroic stretch or one magic exercise. It is a calm knee, a better bike setup, and enough hip and leg strength to keep the pedal stroke steady when the miles pile up.