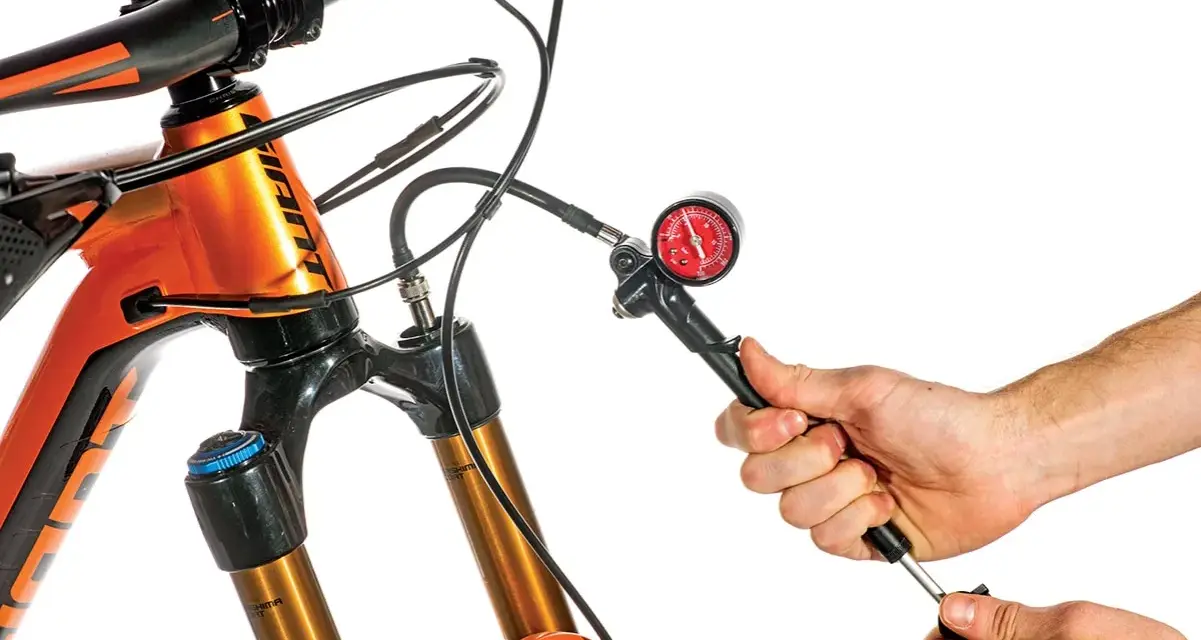
Dialing in an MTB suspension setup changes more than comfort. It affects traction, braking control, cornering support, and how quickly you get tired on long descents or repeated climbs. I like to treat it as a sequence: set sag first, then rebound, then compression and bottom-out support, then test the bike on the terrain you actually ride.
The fastest route to a better ride is to set sag, then rebound, then support in that order
- Start with a realistic baseline, not random click counts or someone else's pressure chart.
- Fork sag usually lands around 15-20% of travel, while rear shocks often sit around 25-30% as a starting point.
- Rebound controls how fast the suspension extends, so it should be slow enough to stay calm but fast enough to recover between hits.
- Compression is for support and shape, not for hiding the wrong spring rate or the wrong amount of sag.
- If sag is correct but the bike still bottoms out too easily, volume spacers, tokens, or a more progressive tune are usually the next move.
- The best final check is a short trail test, not a workshop guess.
Understand what each adjustment actually does
I start every tune by separating the job of the spring from the job of the damper. Sag is how far the bike settles under your weight, rebound is how quickly it extends after a hit, and compression is how much resistance it offers while it is being pushed into travel. If those three ideas are clear, the rest of the setup stops feeling mysterious.
| Part | What it mainly controls | What I watch for |
|---|---|---|
| Spring or air pressure | Ride height and sag | Too much dive, too much harshness, or poor support in the middle of the stroke |
| Rebound damping | How fast the suspension returns | Pogoing, wheel hop, or packing down over repeated hits |
| Compression damping | How much it resists being compressed | Brake dive, wallow in corners, or harshness on square edges |
| Volume spacers or tokens | End-stroke support | Bottom-outs even when sag is already correct |
If your bike uses air springs, pressure is your main ride-height tool and spacers or tokens fine-tune the last part of the travel. If it uses coil, the important decision is the spring rate, with preload used only in a narrow range. I do not try to make a coil shock behave like an air shock, or vice versa. I set each one up for the kind of feel it was designed to give. Once that baseline is clear, sag becomes much easier to judge, because you are no longer guessing what the knobs are doing.
Set sag first and make it your baseline
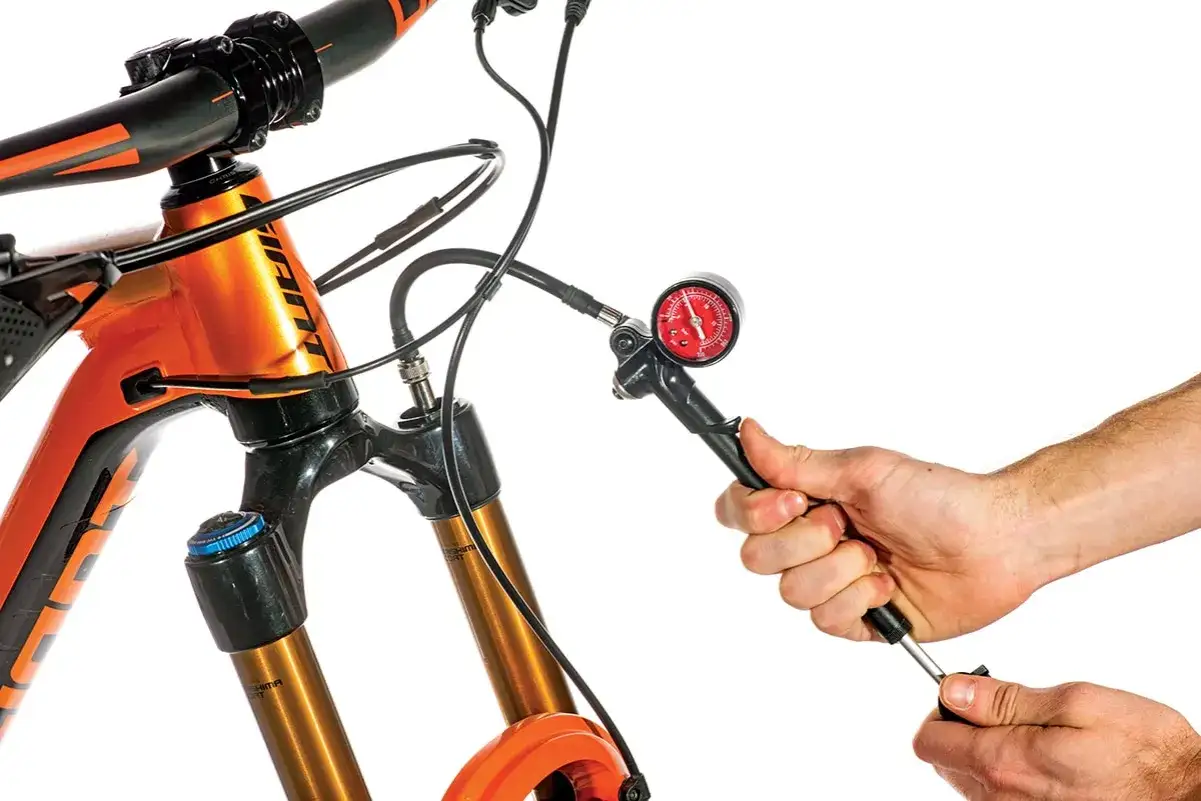
Sag is the amount the suspension compresses under your riding weight in normal gear, and it is the foundation of the whole setup. As a practical starting point, I use 15-20% sag for most forks and 25-30% for most rear shocks, then adjust from there based on terrain and feel. A 160 mm fork at 20% sag, for example, sits about 32 mm into its travel, which is enough to be useful without making the front end lazy.
| Component | Common starting range | What it tends to give you |
|---|---|---|
| Fork | 15-20% of travel | Steering that stays accurate without feeling harsh |
| Rear shock | 25-30% of travel | Better traction, comfort, and rear-wheel compliance |
- Put the compression adjuster in the open position before measuring.
- Wear the same riding kit you will actually ride in, including a pack or hydration vest if you use one.
- Slide the o-ring or zip tie against the seal before you sit on the bike.
- Mount the bike in a neutral riding position, then let the suspension settle without bouncing.
- Step off carefully and measure how far the o-ring moved.
- Add or release air in small steps, usually 5 psi at a time, until you hit the target.
I prefer to fine-tune sag on a short loop rather than in the garage alone. The numbers get you close, but the trail tells you whether the bike sits too high, too deep, or in the sweet spot where it feels calm and alive at the same time. With sag set, the bike is now honest enough to reveal whether rebound or support is the next problem.
Dial rebound before you touch compression
Rebound is the speed at which the suspension extends after it is compressed. Too fast, and the bike feels springy, nervous, or like it is kicking back at you. Too slow, and it starts to pack down over a series of bumps, which makes the bike feel dead and can steal traction. I usually set rebound from a middle point or from the manufacturer's starting recommendation, then make only one or two clicks at a time.
| What you feel | What it usually means | Try this first |
|---|---|---|
| The bike kicks back after hits | Rebound is too fast | Slow rebound by 1-2 clicks |
| The suspension feels glued down over repeated bumps | Rebound is too slow | Speed rebound up by 1-2 clicks |
| The front end dives and stays low in rough braking zones | Not enough support, or too much sag | Add a little pressure first, then revisit rebound |
| The bike feels harsh on square edges | Compression is too closed | Open compression before changing pressure again |
One thing I see riders miss all the time is that pressure and rebound are linked. If you increase air pressure, the spring has more force to return, so you often need a bit more rebound damping to keep it controlled. If you drop pressure, you may need to speed rebound up slightly. The adjustment window is small, but it matters. Once rebound is close, compression becomes much easier to judge, because the bike is moving at a pace you can actually evaluate.
Balance the fork and shock as one system
A bike rarely feels wrong because one end is perfect and the other end is broken. It usually feels wrong because the fork and shock are not speaking the same language. If the front is much softer than the rear, the bike can pitch forward and feel vague when braking. If the rear is much softer than the front, it can squat, drag, or feel like it is hanging behind the rider in corners.
On a full-suspension bike, I try to make both ends recover at the same tempo. That does not mean identical settings, because the fork and shock do different jobs and have different travel, but it does mean the bike should feel coordinated. If one end reacts faster than the other, the chassis can oscillate fore and aft in a way that is hard to notice in the garage and impossible to ignore on trail.
- If the bike dives when you brake, I look at front support first.
- If the rear wheel loses composure on repeated hits, I look at rear rebound and sag.
- If pedaling feels inefficient, I check whether the rear is sitting too deep in the travel.
- If cornering feels nervous, I check whether the fork is too high or too stiff compared with the shock.
Some frames also give you a flip chip or leverage-rate option. I treat that as a platform choice, not a fine-tuning trick. If your bike has a more progressive setting, it can increase bottom-out resistance without forcing you to run excessive pressure. After that, the next step is to match the tune to the kind of trail you actually ride, because a long climb and a rough descent ask for different bias.
Match the tune to the trail you actually ride
I do not set suspension the same way for every rider, because trail choice matters as much as body weight. A smooth XC loop rewards slightly more support and a lighter feel in the travel. A rough enduro trail rewards grip, composure, and more forgiveness in repeated impacts. Most riders live somewhere in the middle, and that is where a balanced setup usually wins.
| Riding style | Bias I would start with | Why |
|---|---|---|
| XC and marathon | Slightly less sag, a bit more low-speed support | Better climbing efficiency and less wallow |
| Trail | Middle-of-the-road sag and open damping | Best all-around traction and support |
| Enduro or bike park | Slightly more sag and more bottom-out control | More grip and comfort on repeated hard hits |
If you are bottoming out too easily with sag already in the right range, I would rather add a volume spacer or token than keep stuffing in more air and ruining small-bump sensitivity. If you are not getting close to full travel at all, the bike is probably too stiff, too progressive, or both. That is where pressure, spacer count, and sometimes frame progression all matter more than another click on the damper. Once the goal is clear, the small details become much easier to interpret.
Avoid the setup mistakes that make good suspension feel bad
Most bad suspension setups are not really bad, they are just inconsistent. I see the same mistakes over and over, and they are easy to fix once you know what to look for.
- Measuring sag in casual clothes instead of full riding gear.
- Leaving lockout or firm mode engaged while checking pressure.
- Copying another rider's click settings instead of starting from your own weight and terrain.
- Using compression to hide a spring that is clearly too soft or too stiff.
- Changing three things at once and then not knowing which one helped.
- Ignoring tire pressure, because an underinflated tire can feel like a soft fork and a harsh tire can feel like a dead one.
- Not writing the final settings down, which makes the next trail day a repeat of the same guesswork.
If I had to pick the biggest mistake, it would be chasing feel without a baseline. One rider's "plush" is another rider's "wallowy," and one person's "supportive" is another person's "harsh." I trust measurable starting points first, then I trust the trail. Once those traps are out of the way, a short trail test is usually enough to confirm whether the bike is genuinely dialed.
The trail test I use before I call it done
I like to test suspension in three places: a climb, a rough braking zone, and a repeated-impact section. The climb shows me whether the bike sits too deep and wastes energy. The braking zone shows me whether the front end stays composed. The repeated hits tell me whether rebound is too fast, too slow, or just right.
- Climb a short grade and notice whether the rear wheel tracks cleanly or bobs too much.
- Brake hard into rough ground and watch for excessive dive or a front wheel that feels disconnected.
- Ride a root or rock sequence and feel whether the suspension recovers between hits or packs down.
- Finish with one larger hit and confirm you use most of the travel without smashing the bumper.
When the bike holds traction, returns quickly enough for the next hit, and stays supportive in the middle of the stroke, I stop tuning. At that point, more clicks usually make the ride worse, not better. The best suspension setup is the one that disappears under you, so the trail feels clear, predictable, and fast.