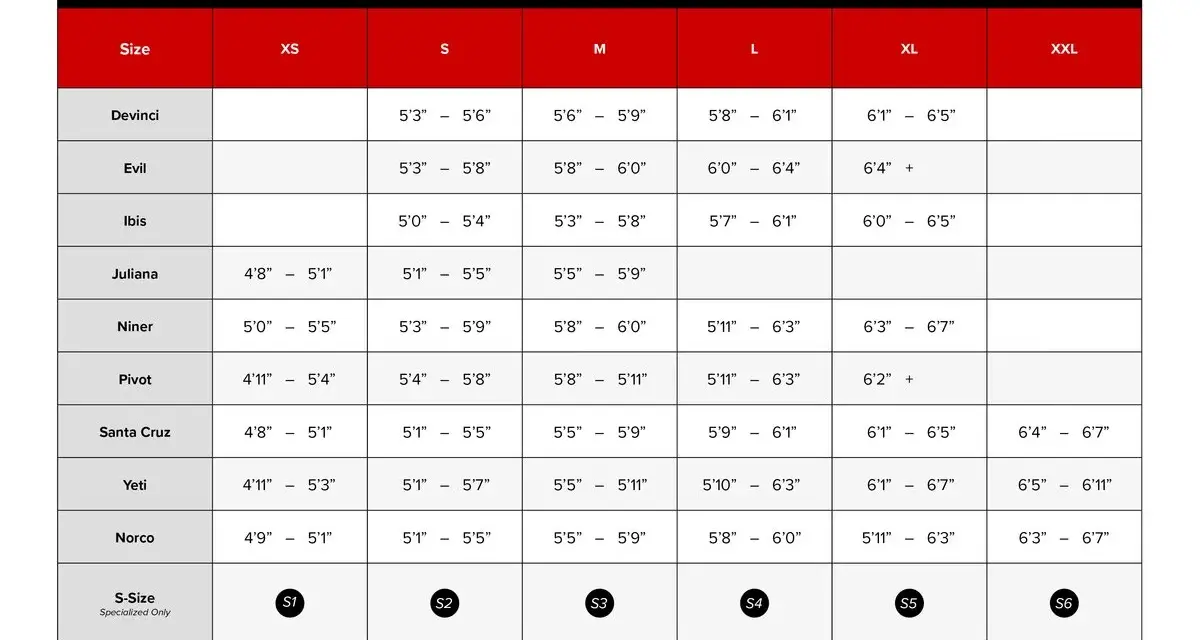
A good fit starts before you compare components or paint. The practical side of how to choose a bike size comes down to a few body measurements, the type of bike you want, and a quick fit check that tells you whether the frame will feel stable, comfortable, and easy to control. Get the size wrong and even a very good bike can feel cramped, stretched, or awkward from the first ride.
The fastest way to narrow the right size
- Measure your inseam in cycling shoes and use it to check standover clearance first.
- Treat height as a starting point, not the final answer.
- Road, mountain, and hybrid bikes use different sizing logic, so compare like with like.
- Read geometry charts for stack, reach, and effective top tube instead of trusting the label alone.
- If you are between sizes, the smaller frame is usually easier to tune.
Start with your body measurements
I always begin with inseam, not just height. Height gives me a rough range, but inseam tells me whether the frame will let the rider stand over the top tube comfortably and set saddle height without forcing awkward compromises. I measure in the shoes I expect to ride in, because cycling shoes change the fit just enough to matter.
| Measurement | Why it matters | How I use it |
|---|---|---|
| Height | A quick starting point for size charts | Narrows the range, but never decides the size by itself |
| Inseam | Checks standover and leg extension | Compares directly to frame clearance and saddle height |
| Torso and arm length | Show how long the cockpit should feel | Helps when comparing reach and stem length |
| Flexibility | Affects how low or stretched you can ride | Points you toward a more upright or more aggressive position |
| Riding shoes | Change the effective leg length | Measure with the shoes you will actually use |
- Put on the cycling shoes you plan to ride in.
- Stand against a wall and place a hardcover book between your legs, spine up.
- Mark the wall where the top of the book meets it.
- Measure from the floor to the mark. Repeat once or twice and use the most consistent result.
That one measurement becomes much more useful when you compare it with the bike type itself, because a road frame and a mountain frame do not size the same way.
Match the bike category before comparing sizes
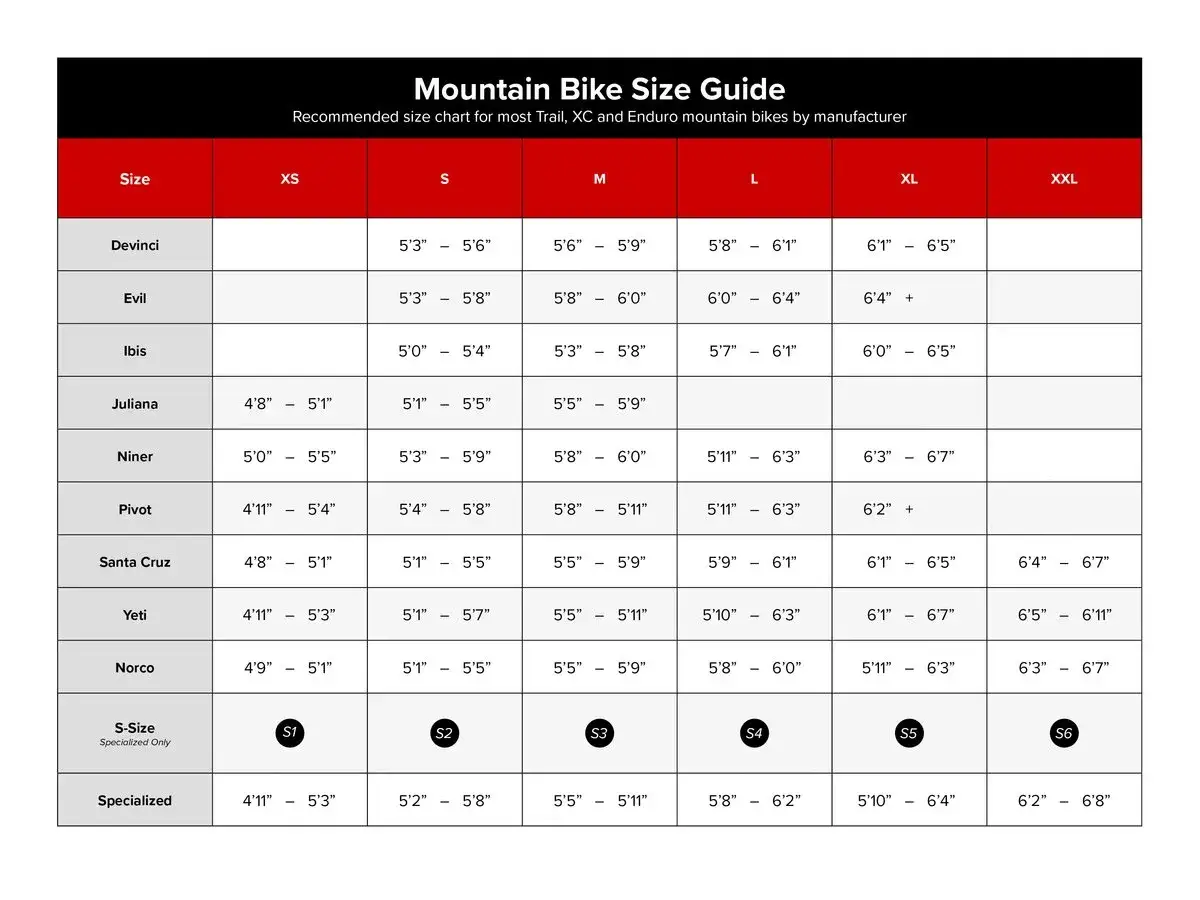
I treat bike category as the filter that comes before the size label. Trek’s sizing tools make the same point: road, mountain, and hybrid bikes do not use one universal fit logic, so a medium in one category is not automatically a medium in another. In the US, brands still mix centimeters, inches, and S/M/L labels, which makes the frame shape even more important than the sticker.
| Bike type | What I prioritize | Practical note |
|---|---|---|
| Road | Stack, reach, and effective top tube | Same nominal size can feel very different across brands |
| Mountain | Reach and standover | Smaller often feels easier to control on descents and tight trails |
| Hybrid or commuter | Standover and upright reach | City commuters often borrow road-bike-style standover logic |
| Step-through or cruiser | Mounting ease and relaxed position | Top-tube clearance is less of a sizing problem |
If I am buying for a child, I reverse the usual temptation and avoid sizing up for growth. Confidence and control matter more than a little extra room to grow when the rider is still learning.
Once the category is clear, I move to the geometry chart, because the size label still does not tell the whole story.
Learn to read geometry numbers
The size sticker is only a shorthand. The numbers I care about most are effective top tube, reach, and stack, because they describe how the bike will place your body once you sit on it. Two bikes with the same label can feel very different if one has a longer front end or a lower front end.
- Effective top tube is the horizontal distance between the head tube and the seat tube. I use it to judge how much room the bike gives me while seated.
- Reach is the horizontal distance from the bottom bracket to the head tube. It is the clearest quick clue for how stretched the bike will feel, especially on mountain bikes.
- Stack is the vertical height of the front of the frame. More stack usually means a more upright position and less pressure on the hands and back.
- Seat tube length tells me something about post exposure, but it is not enough by itself to judge fit.
I care more about these numbers than the frame label because they explain why one brand’s large can feel like another brand’s medium. An endurance road bike and an aggressive race bike can share a nominal size and still place your hands in very different spots.
That is why I do not stop at the chart. The test ride is where sizing mistakes show up in seconds.
Use the test ride to catch hidden fit issues
This is where I confirm that the frame is not just close, but usable. I check standover first, then upper-body reach, then saddle height, because those three things reveal most sizing mistakes before I start swapping stems or saddles.
| Check | What feels right | What suggests the wrong size |
|---|---|---|
| Standover | Road bikes usually need about 1 inch of clearance on a traditional straight top tube and 2 inches or more on a sloping one; mountain bikes need at least 2 inches, and 1 to 2 inches can be acceptable on full suspension because sag reduces clearance | You feel boxed in or cannot dismount confidently |
| Reach | Your elbows stay slightly bent and you can reach the brakes without stretching | Locked arms, shoulder tension, or a stretched neck |
| Saddle height | A slight bend in the leg at the bottom of the pedal stroke, roughly 80 to 90 percent of full extension | Your hips rock side to side or you have to force the post to make it work |
| Brake access | You can brake without shifting your upper body forward | You have to move your whole torso to reach the levers |
That matches REI’s fit guidance: standover matters, but it is not enough on its own. As a rough example, a 30-inch inseam often lines up with about 29 inches of road-bike standover or about 28 inches on a mountain bike, but I still treat that as a starting point rather than a final answer.
For a city commuter or step-through hybrid, I use road-bike-style standover logic, but I do not obsess over the top tube the way I would on a traditional frame. Once the bike passes those checks, the next decision is whether to go smaller or larger.
Choose the smaller or larger frame with a clear reason
When a rider lands between two sizes, I usually lean smaller unless there is a clear reason not to. A smaller frame is easier to lengthen with a stem or cockpit change; a frame that is too large is much harder to shrink without creating awkward handling.
| I usually choose smaller when | I usually choose larger when |
|---|---|
| I want quicker handling or better trail maneuverability | I want a longer, steadier feel at speed |
| My inseam only barely clears standover | I have long arms or a long torso and still have room to move |
| I prefer a more upright position or shorter reach | I already know I like a stretched cockpit |
| I want more room to tune the fit later | The larger frame still leaves enough room for adjustments |
On mountain bikes especially, I am conservative and lean smaller if the choice is close. Handling and confidence are easier to tune than an oversized frame. If I need a very short stem, a slammed seatpost, or a stack of spacer changes just to make a bike tolerable, I stop treating it as a preference issue and call it a sizing problem.
Before I buy, I make one last pass over the practical details that online listings can hide.
The last pass I make before choosing a frame size
- I compare my numbers against the brand’s own chart, not a generic internet chart.
- I check the geometry table for stack, reach, and effective top tube.
- I verify that there is room for normal saddle and handlebar adjustments later.
- I look for a return window or a test-ride option if I am ordering online.
- I consider a professional bike fit if I ride long distances, have a pain history, or am buying a performance road or gravel bike.
The best bike size is the one that disappears under me: enough clearance to feel safe, enough reach to feel efficient, and enough adjustment left to fine-tune the contact points later. If I remember one rule, it is this: choose the frame that fits your body and riding style now, not the one you hope will work after a pile of upgrades.